
Swamp coolers are commonly found in dry and hot climates, such as Nevada, Utah, and Arizona.
They work by a process known as evaporative cooling and are otherwise known as an evaporative air conditioner. This is similar to how the human body works to expel heat through sweating.
When humans sweat they secrete a layer of liquid on top of the surface of their skin. This absorbs heat from your body. The heat in the air causes the liquid to evaporate from your skin, in turn cooling your body down.
In the same way, swamp coolers take in warm air from the outside environment and pass them through evaporative cooler pads. These are wet and act to cool the air passing through. This cooled air is then directed into the interior of the building through a vent. This is done through the use of a blower motor.
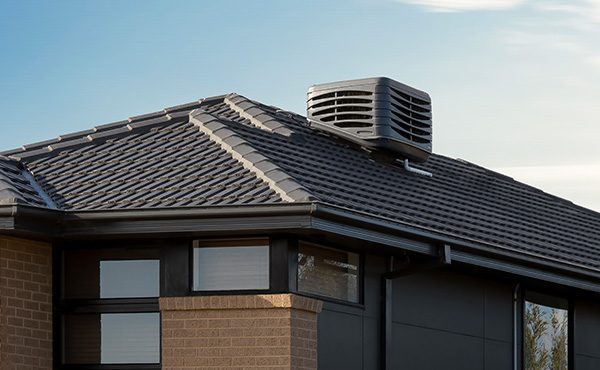
Photo credit: rinnai.com.au
What Are The Parts of a Swamp Cooler?
Swamp coolers have several parts that work together to cool a home.
Evaporative Pads
These line the interior of the swamp cooler. They are the wet pads used to cool the airflow. If the pads are not wet then the cooler will not function properly.
Blower and the Blower Motor
The motor is used to activate the blower. This in turn pulls air into the duct and then forces it out to cool the home. The motor tends to be between ⅓ and 1 horsepower and uses 115 to 120 volts of power.
Float
This is usually located near the base of the swamp cooler. It is used to control the level of water contained within the cooler. As the water level rises, so does the float. When it reaches a certain level, the float is used to shut off the water supply valve.
This float is used to prevent the swamp cooler from overflowing and ensures that it works correctly.
Pump
The pump is also usually located near the base of the cooler. It forces the water through the distribution lines, ensuring that the evaporative pads remain wet. If the pads are not wet, you will likely need to change and replace the pump.
If the pump is still working but the pads are not sufficiently wet, you probably need to increase the pump size.

Photo Credit: Learn.CompactAppliance.com
Water Supply Valve
This is how water enters the swamp cooler, allowing it to perform its function correctly. This usually comes from the inside of your home and is used to connect the cooler to the plumbing.
The valve is connected to the cooler with a copper tube. This is vital to the function of the swamp cooler.
Wire Connection Box
This is how the power supply enters the swamp cooler. It is connected to a wired connection block and uses leads to connect the power supply to the other elements of the cooler.
Drainage and Overflow Tube
The drain is fairly self-explanatory. It is a tube near the base of the cooler and can be removed to drain water out completely. Additionally, if the water level begins to rise too high then the water will drain out through the center of the tube. This will spill onto the ground, making it easy to notice if there are any issues.
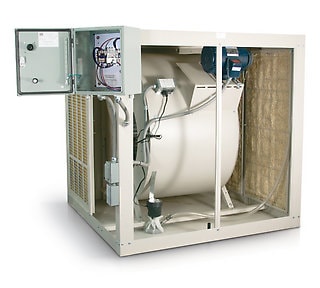
Photo credit: phoenixmanufacturing.com
V-belt
This is a drive belt that helps to move the pulleys inside the swamp cooler. The issue is that these belts can stretch, loosen, and wear out over time. It must also be correctly aligned inside the cooler if it is to work.
You should keep an eye on the condition and tension of your v-belt. They come in many different sizes and you should take care to choose the correct belt. They are very durable and non-slip.
How Do You Install a Swamp Cooler?
The first thing you need to do is to work out the air volume of your home. You do this by multiplying the square footage of your home by the height of your ceilings and the number of air exchanges needed per hour.
Once you know the hourly requirement, you can divide this to find the cubic feet of air required per minute. This is what the air capacity of the swamp cooler will be measured in.
Swamp coolers are commonly seen on the roof of homes. Your next step is to figure out where on the roof you want your cooler to sit. It is important to find a space where there will be a clear path to your ceiling.
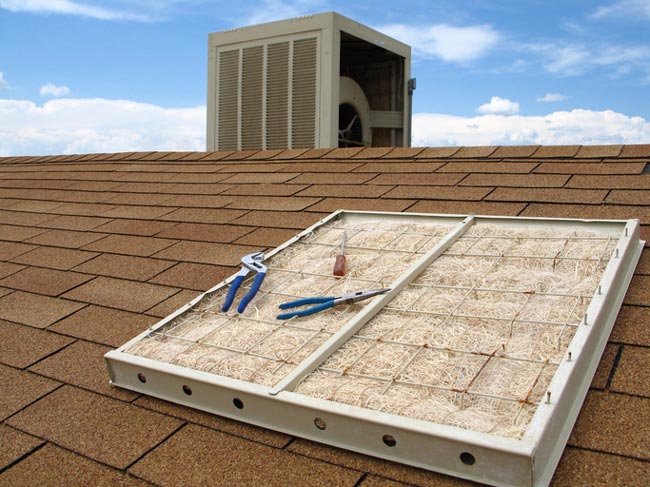
Photo credit: legacyroofingutah.com
A good location will be in the middle of 2 roof joists. You should steer clear of light fixtures, wiring, and any other obstructions.
Mark a space for the outline of the swamp cooler on the roof. This should be marked on the interior using a pen or pencil.
Using an electrical saw, cut out the inside of the duct hole you just drew. We suggest drilling holes in each of the corners to make a starting point for your cuts. This will make the process much easier.
Carefully climb onto the roof of your house. Look at the hole you have created and find the position of the duct connection on the base of your swamp cooler. Use this information to figure out where your cooler mounting brackets should be installed.
It is important to attach the mounting brackets to your roof to make the cooler level when installed. If it is not level then the cooler will not function correctly.
If you cannot align the mounting brackets with the joists in your roof, you should run some metal braces across multiple joists. This allows the weight of the cooler to be spread out across the roof.
Add the metal braces to the roof joints and screw in the mounting brackets. Seal all of the roof holes with caulk or roof tar when you’re done.
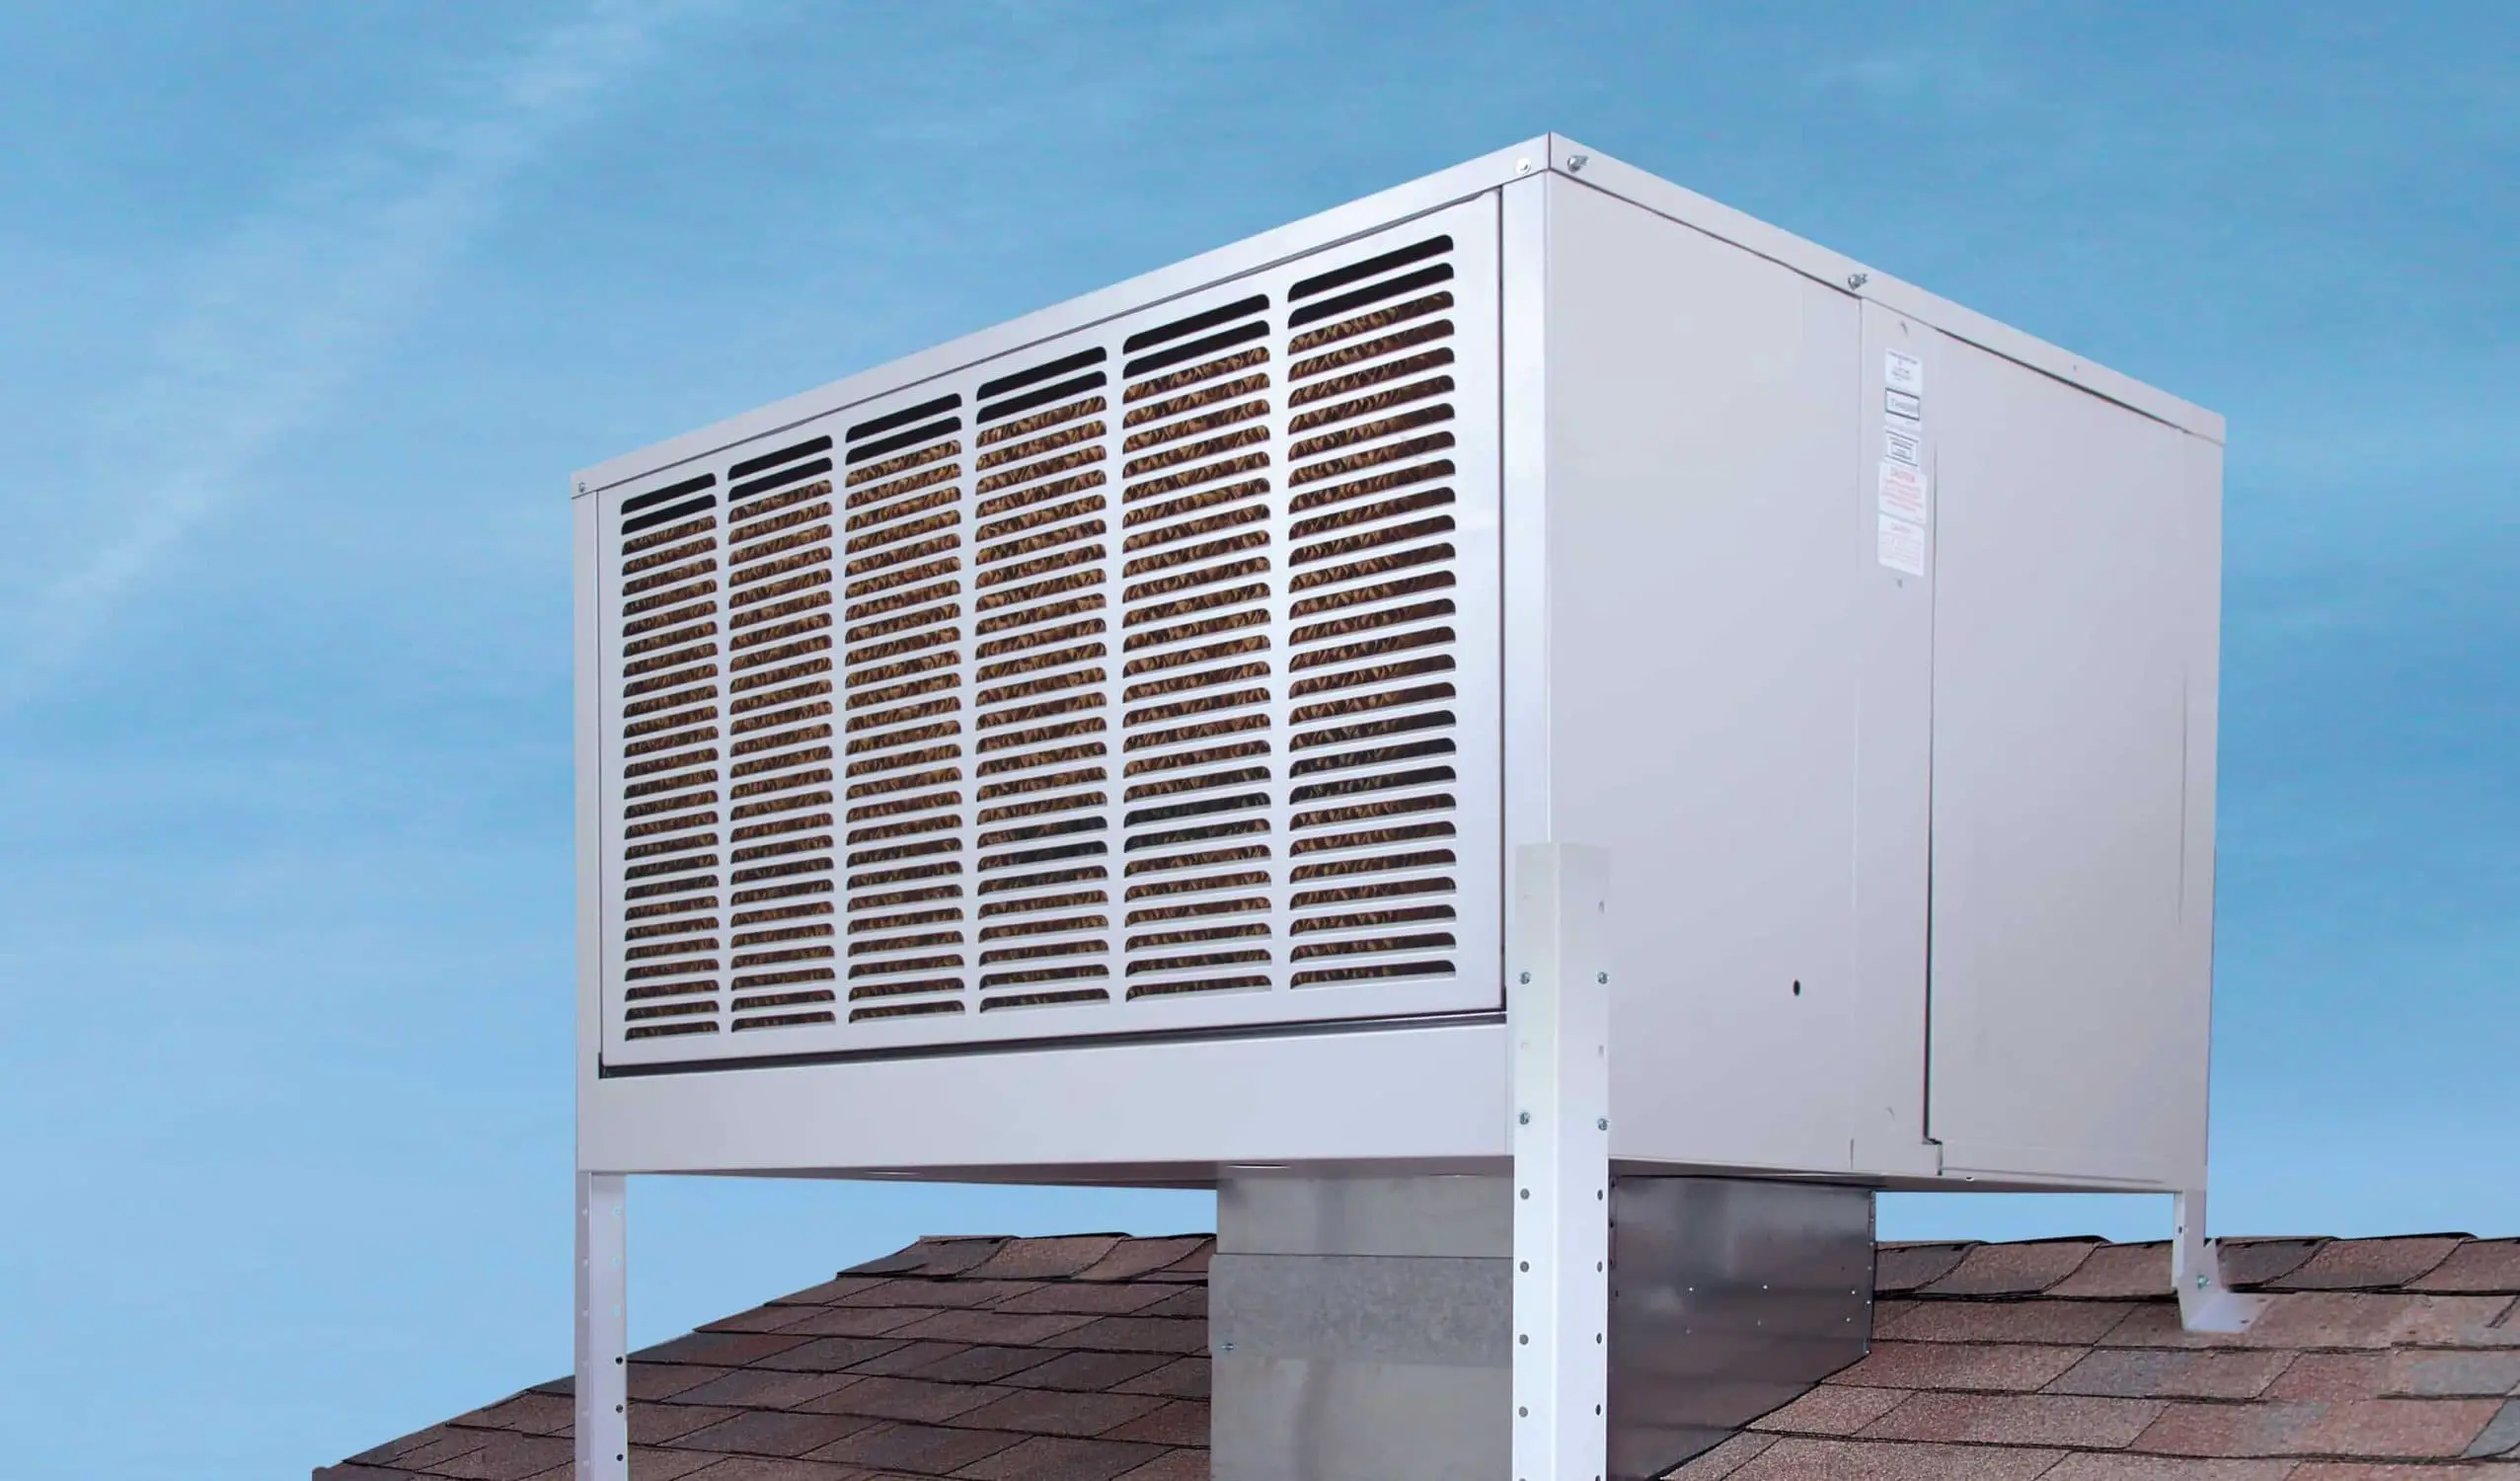
Photo credit: phoenixmanufacturing.com
Find a spot on the ceiling below the swamp cooler. This should be located in between 2 ceiling joists. If you find this hard, use a plumb bob on a string to find the areas below the duct. Try to keep it as vertical as possible for ease of installation.
Using a drywall saw, cut a hole in the ceiling and insert the ceiling duct register.
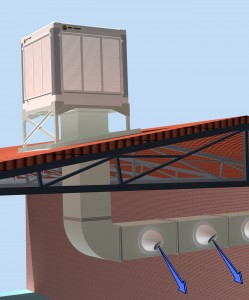
Photo credit: puravent.co.uk
Add the cooler duct, thermostat wire, and a power wire. You should leave additional length on your thermostat wire to allow you to connect it up inside your house. Seal all holes and screws with roof tar or a specially designed waterproofing membrane.
If you need a round and more flexible duct on your cooler, add a duct transition piece. This flexible duct should be added from the roof duct to the ceiling register. We advise using duct tape and screws to hold it in place but follow the manufacturer’s advice for best results.
Place the cooler on top of the mounting brackets and connect it to the duct you have already installed. Secure in place according to the manufacturer’s instructions.
Connect the ends of the thermostat wire to the thermostat on the cooler. The inside thermostat should be connected to the thermostat wire and this should be installed inside the home on a wall away from the ceiling duct.
You should connect the power wire of the cooler to your mains electricity. If you do not have a good grasp of electrical wiring, we suggest contacting a qualified electrician.
Find some PVC or copper piping designed for water. Connect this to the cooler and connect the other end to the home’s cold water supply.
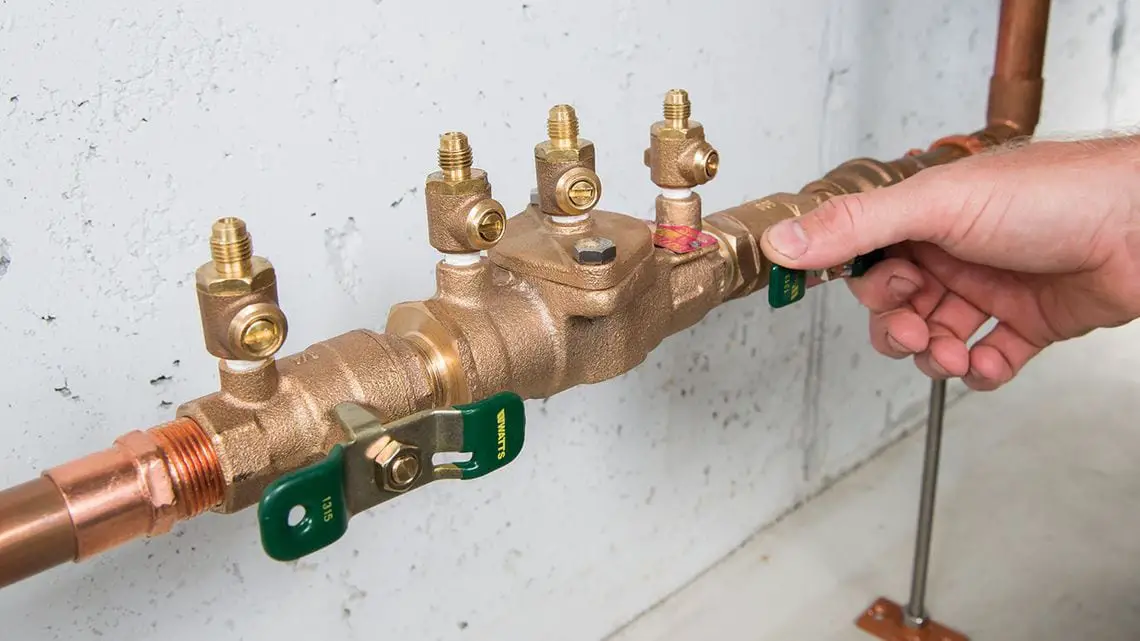
Photo credit: samharbplumbing.com
Seal the holes and connections in the pipe with a caulking gun. Refer to the manufacturer’s guidelines for more detailed installation instructions.
Some authorities will need you to add a water back-flow preventer to your cold water supply. It is important to check this with your local authorities.
Your final step is to switch on the water supply to the cooler. Check all pipes and connections for any leaks. The power should be switched on now too. Reduce the temperature settings of the thermostat.
Ideally, you will set the thermostat lower than the ambient temperature of your home. This will allow you to work out whether the swamp cooler cools the air going into your home.
Finally, check all of your connections again, sealing any holes with aluminum tape.
How Does a Swamp Cooler Work?
Water enters the swamp cooler through the water supply valve when you switch it on. This enters at the base and fills the tank. Once the float reaches a certain level, a signal is sent to the water supply valve to switch off.
The pump is then activated and begins to pull water from the tank to the water distribution lines. They are found at the top of the evaporative pads and are how water travels through the pads.
If you do not feel your cooler is cooling your house sufficiently, switching your cooler to a pump will pour more water through the pads.
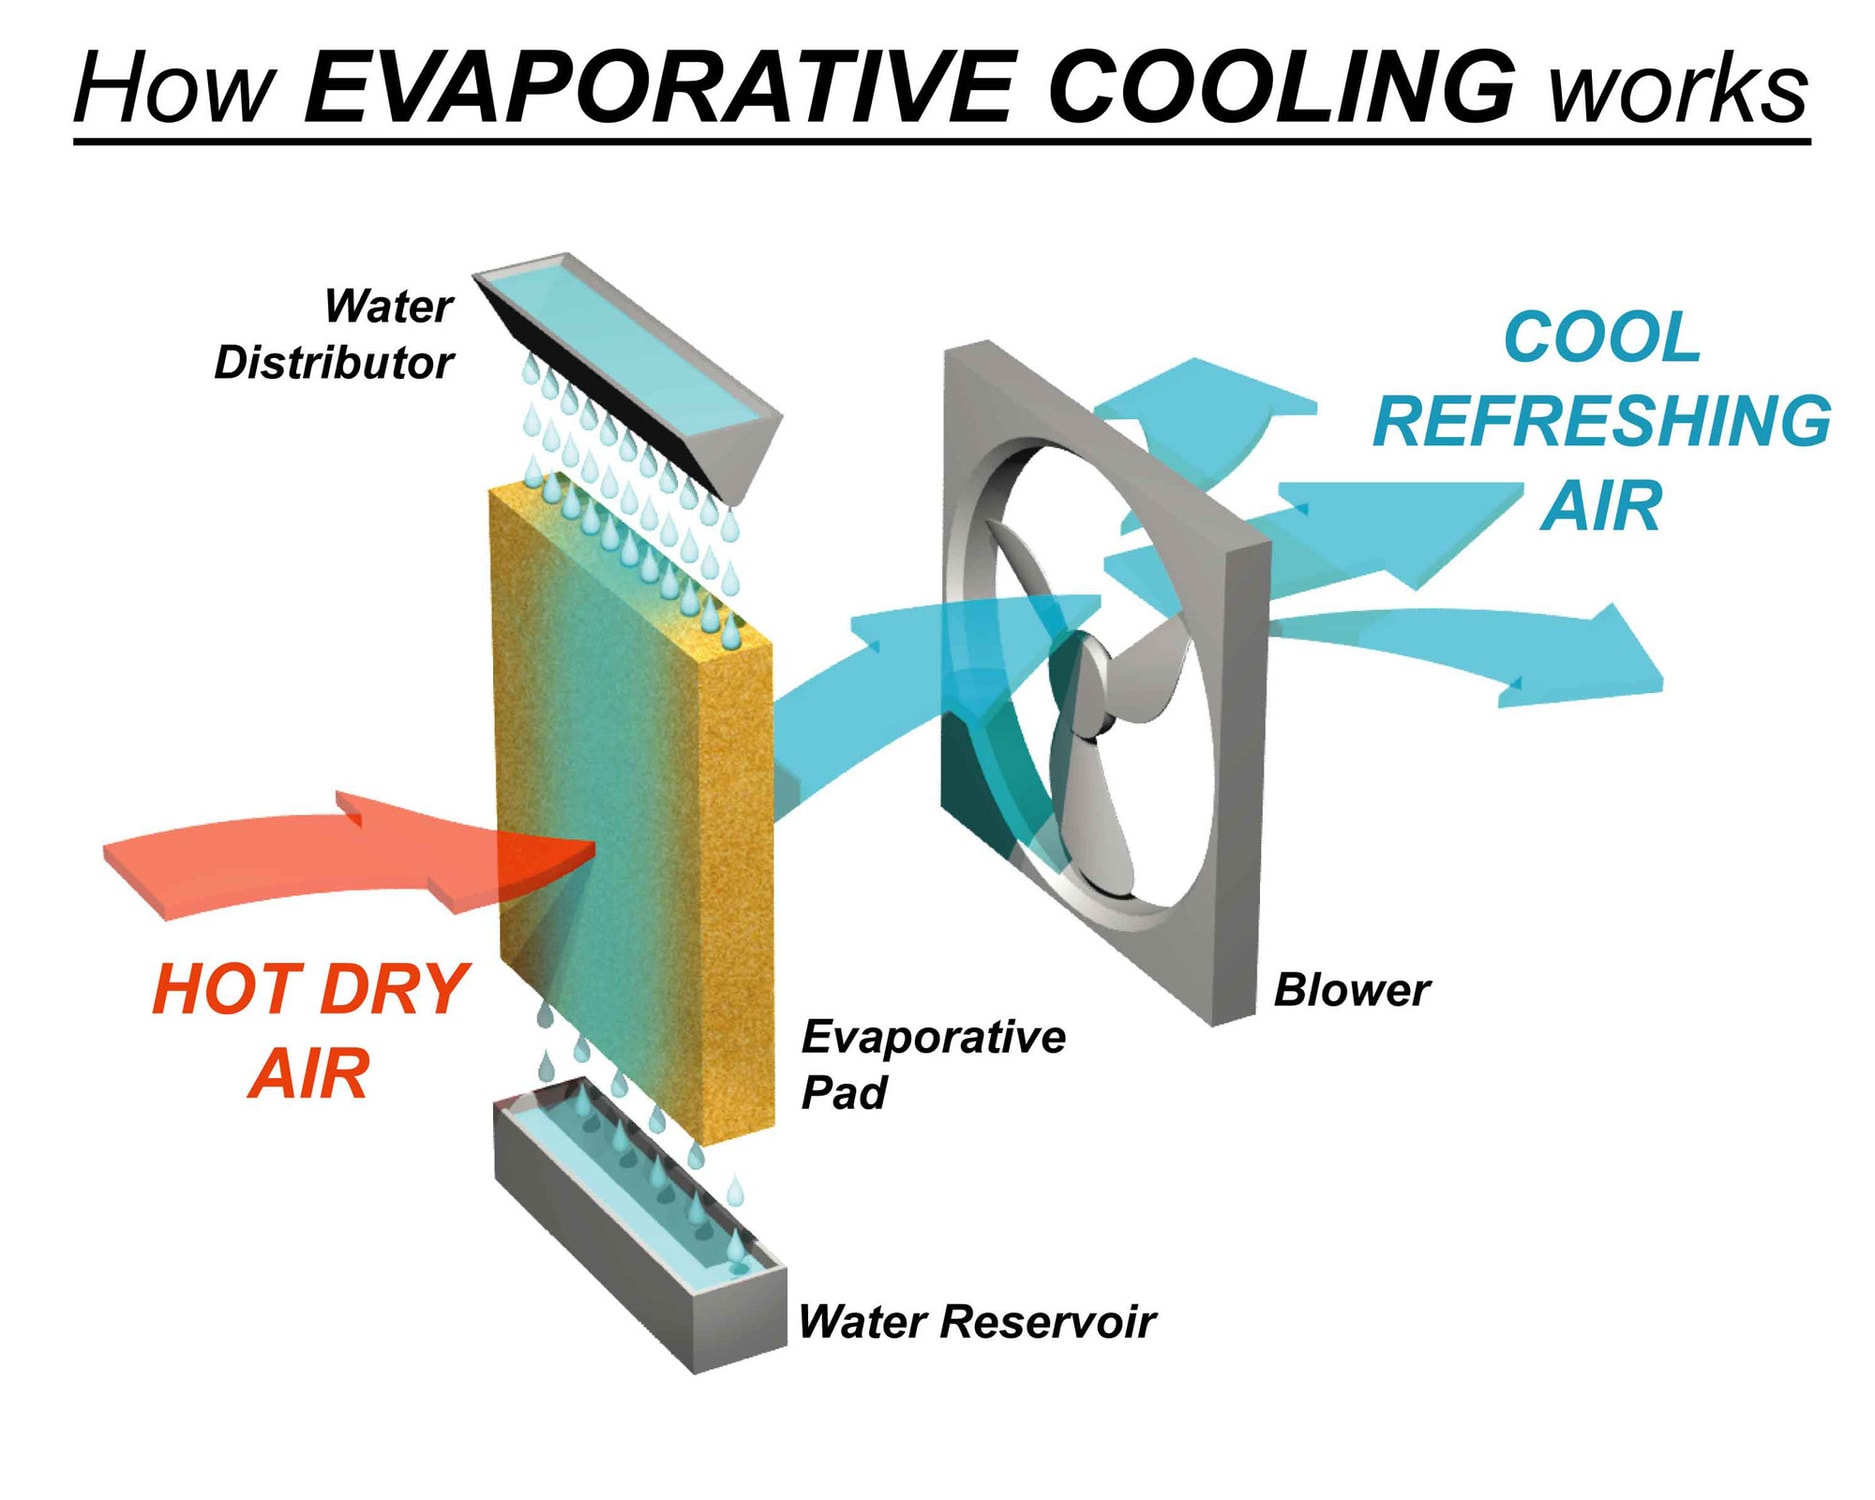
Photo credit: vankool.com
This will make the air blowing into your house cooler.
Once the pads are wet, the blower motor pulls warm air from the outside into the swamp cooler. This is dragged through the wet pads, becoming cooled and cleaned as it moves.
Once the air has been cooled, the blower forces it through the vent and ducts, into your home.
How Do You Maintain Your Swamp Cooler?
Maintenance is particularly important if your cooler is mounted on the roof is winterizing the cooler. This is taking precautions to ensure it does not rust or freeze. To protect it, you should turn off the water supply. Besides, you need to rinse out the water pan and clean out and debris that has settled.
You should change and replace your evaporating cooling pads regularly. Dirt, debris, and minerals can build up on the surface of the pads which can make them ineffective. This can lead to the cooler walls rusting as water drips down them. It is a good idea to change these in the fall.
Other Related Content
Here is some other content that might interest you. :